
Di Dewacloud, kamu bisa menginstal berbagai macam aplikasi, sebagai contoh Zimbra Mail Server pada Elastic VPS Dewacloud, simak penjelasan tutorial Instalasi Zimbra di Dewacloud Elastic VPS berikut.
Zimbra
Zimbra adalah open source collaborative software yang memiliki mail server dan web client. Dapat digunakan untuk aktivitas dan kebutuhan email, calendar, file sharing, chatting dan lain-lain. Zimbra support beberapa OS, seperti Ubuntu, RHEL dan CentOS.
Instalasi Zimbra di Dewacloud Elastic VPS
Untuk dapat menginstal Zimbra di Dewacloud Elastic VPS, kamu perlu login ke Dewacloud Dashboard dan klik menu New Environment.
![]()
Kemudian atur topology untuk kebutuhan Instalasi Zimbra. Kami menambahkan Load Balancer untuk dapat melakukan routing traffic & domain. Jika sudah, tentukan Region & Environment Name.

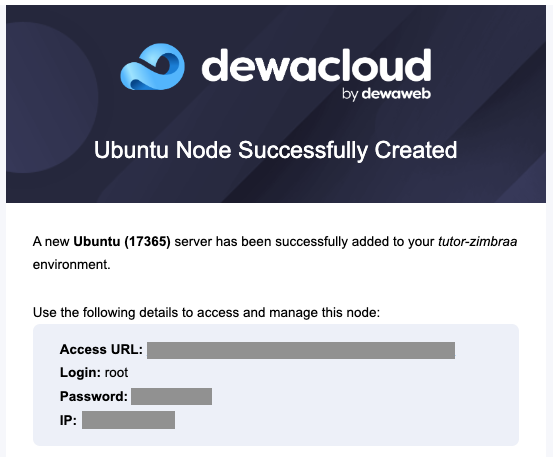
Jika proses create environmentnya telah selesai, kamu akan mendapatkan informasi mengenai akses Elastic VPS yang kamu buat.
Lakukan connect ke Web SSH di Dewacloud Dashboard.

Update Server
Login sebagai root ke server dan update server untuk memastikan packages nya sudah up-to-date.
$ apt-get update -y

$ reboot
Install beberapa packages yang dibutuhkan.
$ apt-get install nano perl wget curl -y
Install & Download Zimbra Collaboration
Download File Zimbra untuk Ubuntu 18.04 yang latest version pada link Zimbra Collaboration atau Zimbra Releases, kemudian untuk downloadnya dengan perintah di bawah ini.
$ wget https://files.zimbra.com/downloads/8.8.15_GA/zcs-8.8.15_GA_3869.UBUNTU18_64.20190918004220.tgz

$ tar -xvf zcs-8.8.15_GA_3869.UBUNTU18_64.20190918004220.tgz

$ cd zcs-8.8.15_GA_3869.UBUNTU18_64.20190918004220/
Hapus beberapa package yang sudah tersedia di Elastic VPS.
$ apt-get remove sendmail sendmail-bin -y
Pastikan domain yang akan kamu gunakan nantinya sudah mengarahkan A Records & MX Records.
A Records

MX Records

Jalankan Installernya.
$ ./install.sh --platform-override
Akan ada output beberapa form yang perlu kamu isi dengan Y atau N.
Do you agree with the terms of the software license agreement? [N] Y


Use Zimbra's package repository [Y]


Warning: apt-key output should not be parsed (stdout is not a terminal)

Importing Zimbra GPG key


Configuring package repository


Checking for installable packages


Found zimbra-core (local)

Found zimbra-ldap (local)

Found zimbra-logger (local)

Found zimbra-mta (local)

Found zimbra-dnscache (local)

Found zimbra-snmp (local)

Found zimbra-store (local)

Found zimbra-apache (local)

Found zimbra-spell (local)

Found zimbra-memcached (repo)

Found zimbra-proxy (local)

Found zimbra-drive (repo)

Found zimbra-imapd (local)

Found zimbra-patch (repo)

Found zimbra-mta-patch (repo)

Found zimbra-proxy-patch (repo)


Select the packages to install

Install zimbra-ldap [Y]


Install zimbra-logger [Y]


Install zimbra-mta [Y]


Install zimbra-dnscache [Y]


Install zimbra-snmp [Y]


Install zimbra-store [Y]


Install zimbra-apache [Y]


Install zimbra-spell [Y]


Install zimbra-memcached [Y]


Install zimbra-proxy [Y]


Install zimbra-drive [Y]


Install zimbra-imapd (BETA - for evaluation only) [N] Y


Install zimbra-chat [Y]

Checking required space for zimbra-core

Checking space for zimbra-store

Checking required packages for zimbra-store

zimbra-store package check complete.


Installing:

    zimbra-core

    zimbra-logger

    zimbra-mta

    zimbra-snmp

    zimbra-store

    zimbra-apache

    zimbra-spell

    zimbra-memcached

    zimbra-proxy

    zimbra-drive

    zimbra-imapd

    zimbra-patch

    zimbra-mta-patch

    zimbra-proxy-patch

    zimbra-chat

The system will be modified.  Continue? [N] Y
Kemudian enter Y untuk melanjutkan instalasi.
Kemudian akan muncul output di bawah ini.
Running Post Installation Configuration:

Operations logged to /tmp/zmsetup.20220815-024236.log

Installing LDAP configuration database...done.

Setting defaults...


DNS ERROR resolving MX for xxxx.user.cloudjkt01.com

It is suggested that the domain name have an MX record configured in DNS

Change domain name? [Yes]
Karena secara default akan menggunakan nama node kamu, jika ingin mengubah ke domain, kamu bisa ubah domainnya dengan tekan ENTER.
Create domain: [xxxx.user.cloudjkt01.com] zimbra-elastic.dewiweb.net
Masukkan nama domain kamu dan tekan ENTER.
Create domain: [xxxx.user.cloudjkt01.com] zimbra-elastic.dewiweb.net

MX: zimbra-elastic.dewiweb.net (103.xxx.xxx.xxx)


Interface: 127.0.0.1

Interface: ::1

Interface: 103.xxx.xxx.xxx

Interface: 172.16.1.66

done.

Checking for port conflicts


Main menu


   1) Common Configuration:

   2) zimbra-ldap:                             Enabled

   3) zimbra-logger:                           Enabled

   4) zimbra-mta:                              Enabled

   5) zimbra-dnscache:                         Enabled

   6) zimbra-snmp:                             Enabled

   7) zimbra-store:                            Enabled

        +Create Admin User:                    yes

        +Admin user to create:                 [email protected]

******* +Admin Password                        UNSET

        +Anti-virus quarantine user:           [email protected]

        +Enable automated spam training:       yes

        +Spam training user:                   [email protected]

        +Non-spam(Ham) training user:          [email protected]

        +SMTP host:                            xxxx.user.cloudjkt01.com

        +Web server HTTP port:                 8080

        +Web server HTTPS port:                8443

        +Web server mode:                      https

        +IMAP server port:                     7143

        +IMAP server SSL port:                 7993

        +POP server port:                      7110

        +POP server SSL port:                  7995

        +Use spell check server:               yes

        +Spell server URL:                     http://xxxx.user.cloudjkt01.com:7780/aspell.php

        +Enable version update checks:         TRUE

        +Enable version update notifications:  TRUE

        +Version update notification email:    [email protected]

        +Version update source email:          [email protected]

        +Install mailstore (service webapp):   yes

        +Install UI (zimbra,zimbraAdmin webapps): yes


   8) zimbra-spell:                            Enabled

   9) zimbra-proxy:                            Enabled

  10) zimbra-imapd:                            Enabled

  11) Default Class of Service Configuration:
-
s) Save config to file -
x) Expand menu -
q) Quit
Address unconfigured (**) items (? - help) 7
Admin passwordnya masih UNSET, sehingga perlu Pilih 7 untuk melakukan setting Admin Password.
Store configuration


   1) Status:                                  Enabled

   2) Create Admin User:                       yes

   3) Admin user to create:                    [email protected]

** 4) Admin Password                           UNSET

   5) Anti-virus quarantine user:              [email protected]

   6) Enable automated spam training:          yes

   7) Spam training user:                      [email protected]

   8) Non-spam(Ham) training user:             [email protected]

   9) SMTP host:                               xxxx.user.cloudjkt01.com

  10) Web server HTTP port:                    8080

  11) Web server HTTPS port:                   8443

  12) Web server mode:                         https

  13) IMAP server port:                        7143

  14) IMAP server SSL port:                    7993

  15) POP server port:                         7110

  16) POP server SSL port:                     7995

  17) Use spell check server:                  yes

  18) Spell server URL:                        http://xxxx.user.cloudjkt01.com:7780/aspell.php

  19) Enable version update checks:            TRUE

  20) Enable version update notifications:     TRUE

  21) Version update notification email:       [email protected]

  22) Version update source email:             [email protected]

  23) Install mailstore (service webapp):      yes

  24) Install UI (zimbra,zimbraAdmin webapps): yes


Select, or 'r' for previous menu [r] 4
Pilih 4 untuk set admin password.
Password for [email protected] (min 6 characters): [_Ej3dp_As_] dewaweb123
Kami menggunakan dewaweb123 sebagai admin password untuk mudah digunakan, karena ini hanya tutorial, untuk production kamu perlu gunakan password yang strong.
Kalau kamu ingin menggunakan password yang di generate oleh Zimbra, maka tidak perlu memasukkan password kembali, langsung ENTER saja.
Select, or 'r' for previous menu [r] r
Kemudian ketik r untuk ke menu sebelumnya.
Masukkan a untuk apply config dan ketik ENTER atau ketik y untuk melanjutkan instalasi.
Main menu


   1) Common Configuration:

   2) zimbra-ldap:                             Enabled

   3) zimbra-logger:                           Enabled

   4) zimbra-mta:                              Enabled

   5) zimbra-dnscache:                         Enabled

   6) zimbra-snmp:                             Enabled

   7) zimbra-store:                            Enabled

   8) zimbra-spell:                            Enabled

   9) zimbra-proxy:                            Enabled

  10) zimbra-imapd:                            Enabled

  11) Default Class of Service Configuration:
-
s) Save config to file -
x) Expand menu -
q) Quit
*** CONFIGURATION COMPLETE - press 'a' to apply

Select from menu, or press 'a' to apply config (? - help) a

Save configuration data to a file? [Yes]

Save config in file: [/opt/zimbra/config.23434]

Saving config in /opt/zimbra/config.23434...done.

The system will be modified - continue? [No] Y

Operations logged to /tmp/zmsetup.20220815-033243.log

Setting local config values...done.

Initializing core config...Setting up CA...done.

Deploying CA to /opt/zimbra/conf/ca ...done.

Creating SSL zimbra-imapd certificate...done.

Creating new zimbra-store SSL certificate...done.

Creating new zimbra-ldap SSL certificate...done.

Creating new zimbra-mta SSL certificate...done.

Creating new zimbra-proxy SSL certificate...done.

...

Finished installing common zimlets.

Restarting mailboxd...done.

Creating galsync account for default domain...done.


You have the option of notifying Zimbra of your installation.

This helps us to track the uptake of the Zimbra Collaboration Server.

The only information that will be transmitted is:

The VERSION of zcs installed (8.8.15_GA_3869_UBUNTU18_64)

The ADMIN EMAIL ADDRESS created ([email protected])


Notify Zimbra of your installation? [Yes] N

Notification skipped

Checking if the NG started running...done.

Setting up zimbra crontab...done.


Moving /tmp/zmsetup.20220815-033243.log to /opt/zimbra/log


Configuration complete - press return to exit
Output di atas menandakan bahwa instalasi Zimbra Mail Server sudah selesai.
Enable Port
Enable Port 7071 (Zimbra) di Environment Firewall pada nodes Elastic VPS.

Jika sudah Add.
Testing
Langkah terakhir adalah test akses domain atau IP yang sudah kamu setting dengan port 7071 melalui browser.

Ini adalah tampilan dari halaman login Admin Console di Zimbra. Kamu bisa login menggunakan username dan password sebelumnya yang sudah kamu set saat instalasi.
Ini adalah tampilan setelah login dari Administrator Zimbra Mail Server.

Kamu juga bisa melihat service yang berhasil di install di Zimbra, klik pada Monitor > Server Status.

Ini adalah tampilan dari Service Status Zimbra.
Kesimpulan
Jika kamu mengikuti artikel ini dari awal sampai akhir, artinya kamu telah berhasil melakukan Instalasi Zimbra di Dewacloud Elastic VPS. Demikian artikel ini, jangan sungkan untuk meninggalkan ide-ide topik yang ingin kamu baca di blog Dewacloud. Semoga artikel ini membantu